To test the vacuum pump, turn on the ignition but do not start the engine. The pump should run, slow down and stop. If it does this, you do not have any leaks and the vacuum pump is O.K. If it runs and continues to run, then pull the vacuum line off the pump. Put your finger over the inlet on the pump and if the pump stops, you have a vacuum leak that you need to find but the pump is O.K. If putting your finger over the inlet does not stop the pump, there may be cracks in the housing, or other problems with the pump that this article does not covers. If the pump does not run even with the inlet hose disconnected, you have the problem that I had. First, I swapped pumps with my son's ZR1 to make sure that his pump ran on my car and my pump did not run on his car (everyone should have two ZR1's as it makes fixing problems easier and if you don't, make friends with someone else who has one). This is necessary to check that you are getting power to the motor. You could use a volt-ohm meter but I like to see it actually work.
My pump would not run and new ones were going from $220 up.
I figured I had nothing to lose by trying to fix mine, since it did not work.
An ohm meter check on the two connections showed that the circuit had a discontinuity somewhere.
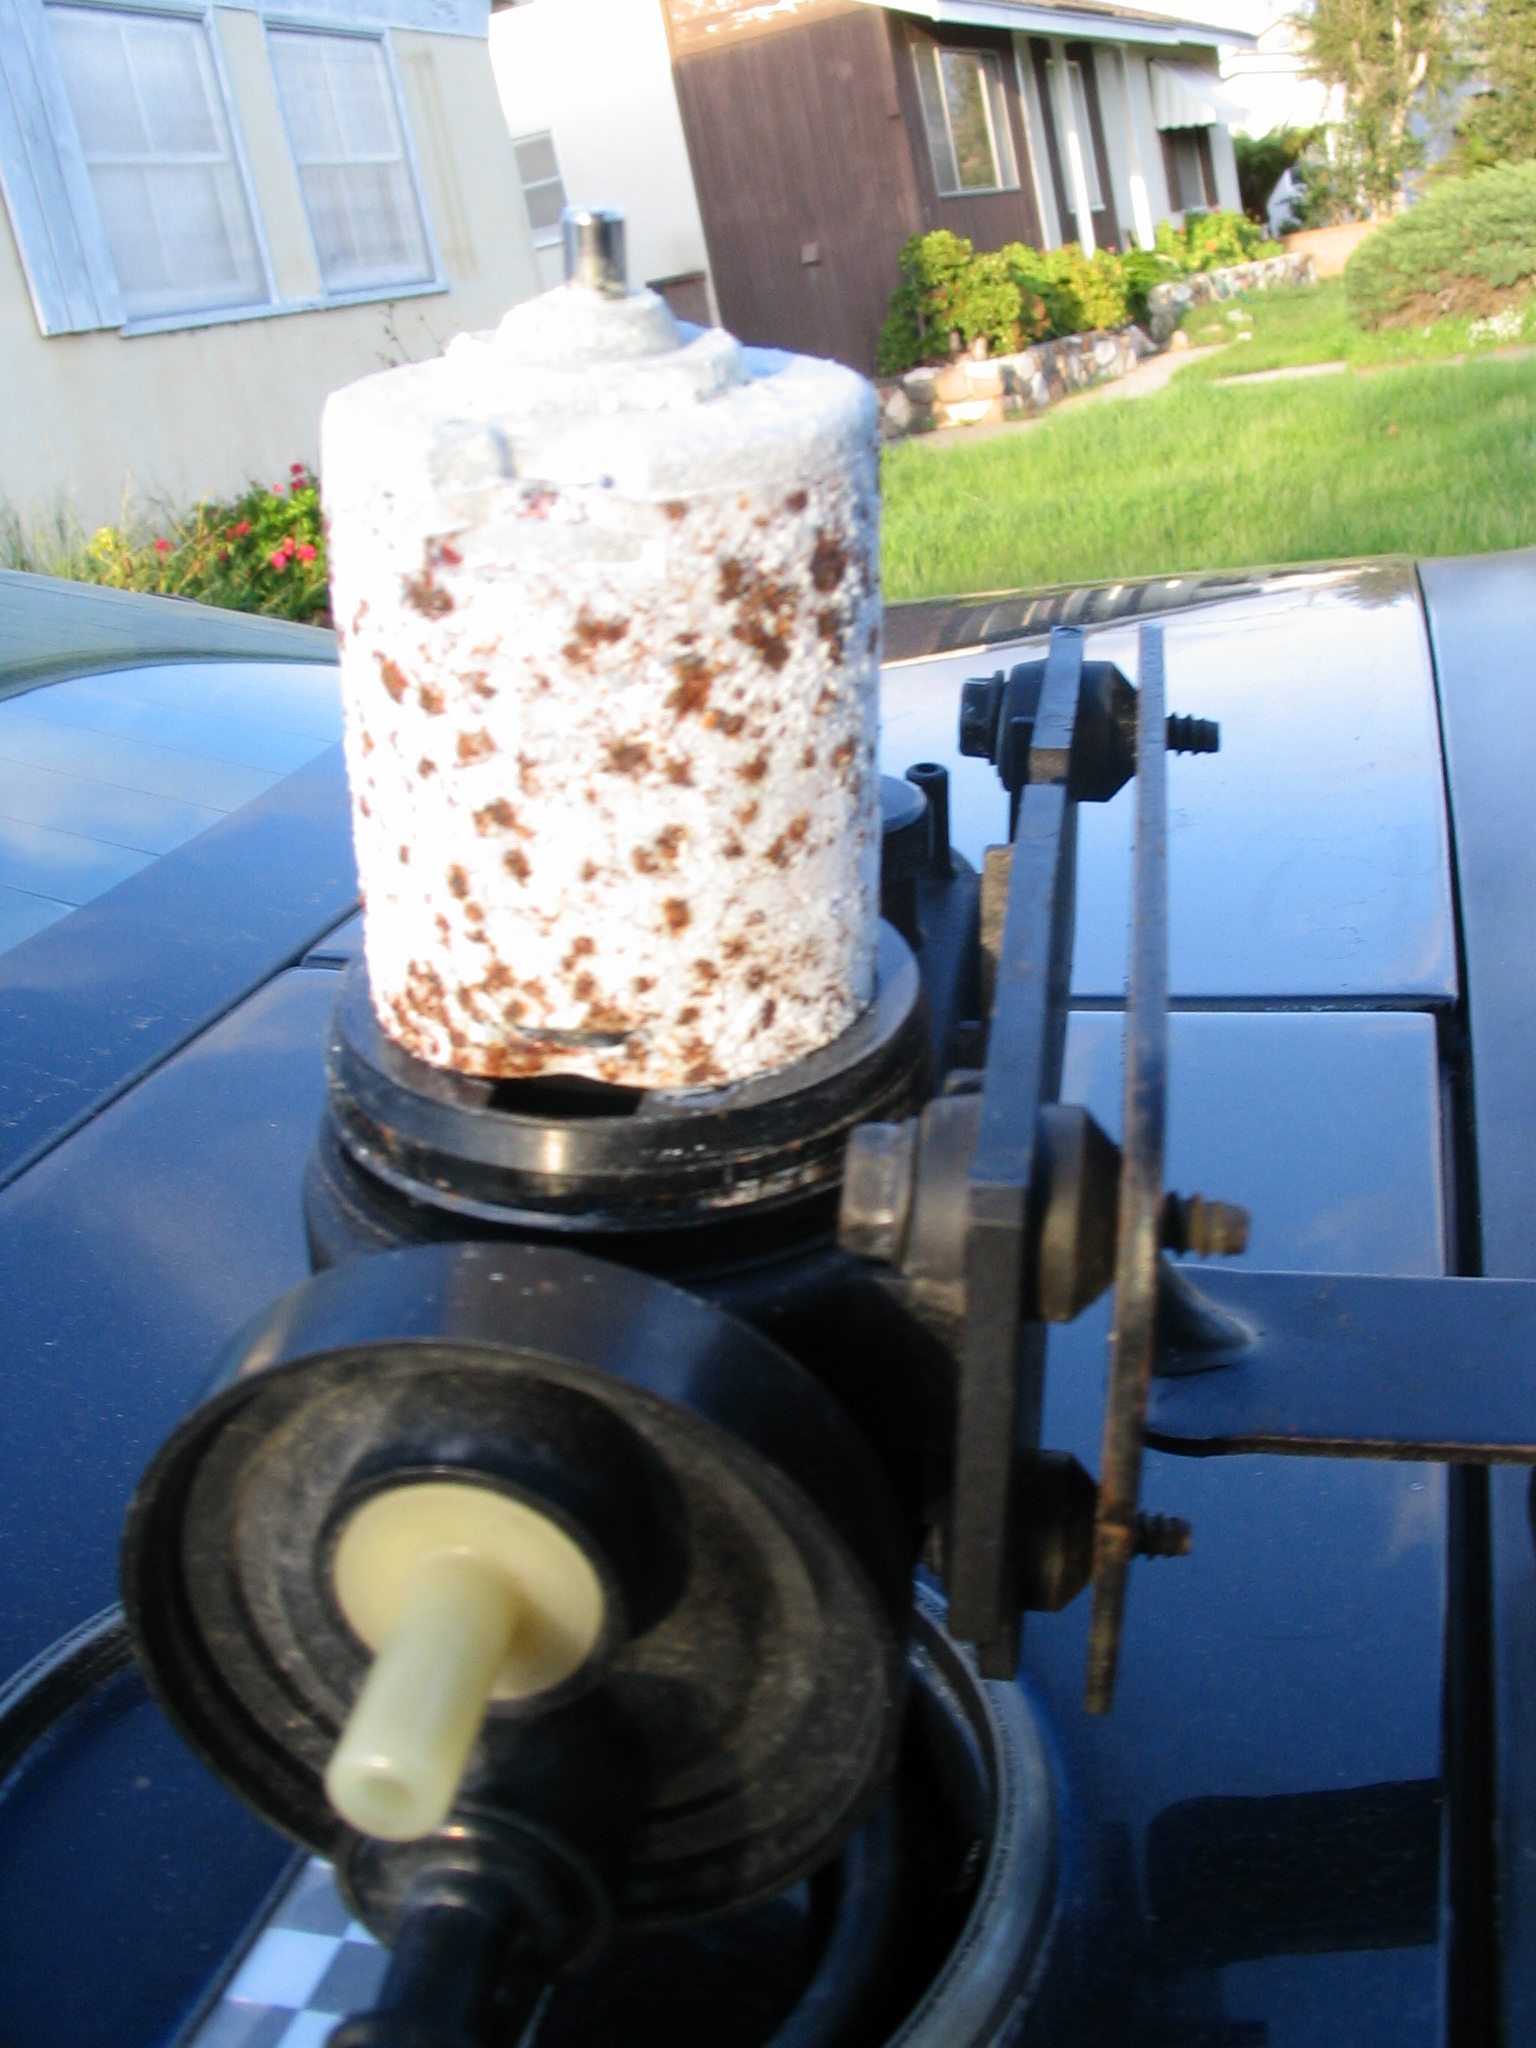
I pried up the top (good design - repairable - it is a snap-in rubber seal). When I checked the continuity,
I found that I was having trouble on the board under the goo. I probed through the goo with a needle and while messing
around I got continuity but did not have to fix anything as it fixed itself.
I put the vacuum pump back on the car but it still did not work so I had to take it off again.
I grabbed the plastic housing enclosing the motor and pulled. (It is a snap-on, too! Gee whiz, is GM finally
making things easy to repair? I doubt it; it must just cost less to make this way). Well, the motor casing was crimped on.
(There goes the GM Mr. Nice Guy theory, they used to use bolts not crimps.)
Afterthought! I should have grabbed the hardened steel shaft that sticks out and turned it with pliers as they will not mar
the hardened shaft and it may have got it unstuck enough to wear in. The points were OK!
I tried making something that would pull the crimp out but could not get anything strong enough in there.
I noticed that the crimps formed an inclined plane and so I put the vacuum pump in a wooden vice and got out my channel locks.
I twisted the motor casing back and forth until it was able to turn past the slots.
Don't crush it- if it starts to crush, move your channel locks a quarter turn to get over the magnets;
you do not have to squeeze hard. The case will then come up.
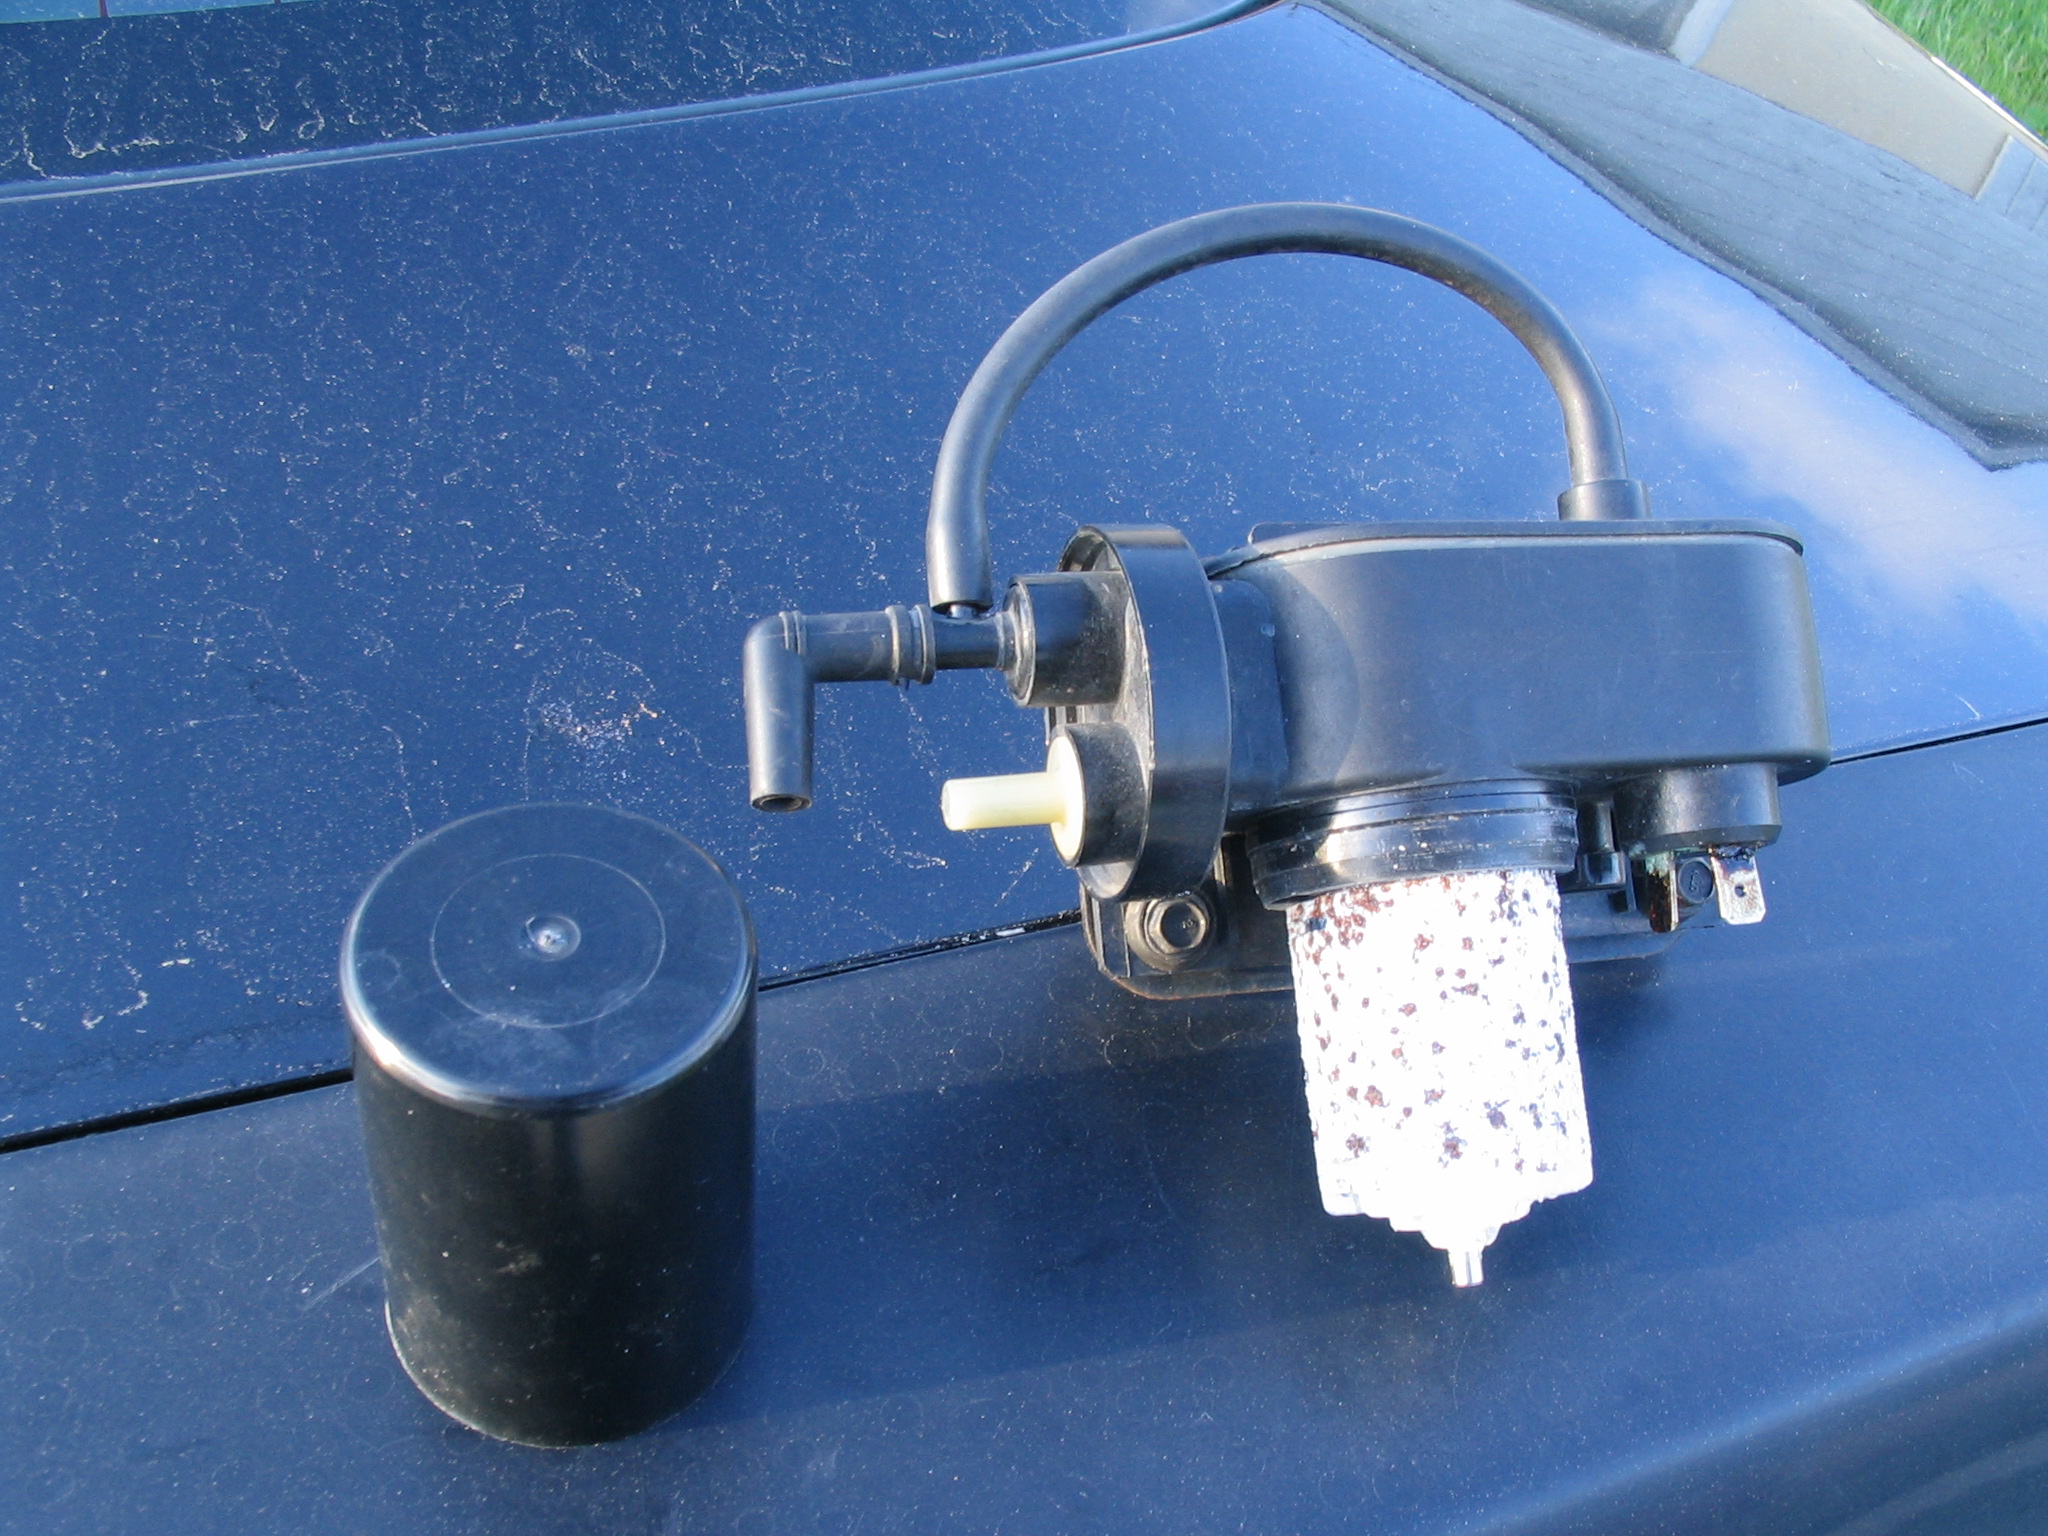
There is a spring steel washer that fell but caught on the magnetic core.
The hardened steel shaft has a bushing on it that I twisted and moved up and down the shaft to clean the crust off of the shaft.
The center shaft I rotated to make sure that it turned freely.
Put the spring steel washer back on the shaft and put the case on.
It is kind of tight so I did not have to crimp it to test it.
I put it back in the car and it ran fine but I still had a bad vacuum leak to fix.
I pulled the plenum up and checked for vacuum leaks. I did not find any leaks under the plenum. I found one in the line before it went
under the plenum which I fixed by putting a new rubber fitting on which I bought at an auto parts store.
I then checked again and the pump stopped when I put my finger over the hose that connects to the side of the plenum on the driver's side
so I assumed that it would be OK after it was back together.
I was angry because I thought that I had pulled the plenum for nothing.
I put the plenum back on and tested for leaks again. The pump had slowed down but there was still a leak.
So, I pulled the plenum again and found that the vacuum one way check valve that stops low (or in this case no) manifold pressure was bad.
The vacuum check valve was only $3.99 at the Chevrolet dealer, part number "GM 460734".
I made my mistake when I put my finger over the hose at the driver's side of the plenum since my finger did the work the valve was meant to
do.
Next time I have a vacuum leak, the first thing I would do is pull the vacuum lines off of the top of the plenum on both sides and hold my
fingers over the ends before pulling the plenum, If it stops, the only leak is one of the two valves.
Release each of the two valves, one at a time, to find out which one and get a new one.
I would just add it in line to the outside of the plenum until I had to pull the plenum for another reason and replace the
bad one at that time. That would save a lot of work.
by Jim Blanchard
Work Assisted by Wells Blanchard
Article edited by Kay Blanchard